Part 1
Part 2
Wednesday, December 28, 2011
Sculpting

Learn to sculpt a face in polymer clay....in 45 (baby) steps
Then when you're done paint the face:
and finally make a permanent wig for your polymer head
Monday, November 21, 2011
Cold Porcelain cont'd
 a doll's head
 a different doll's head
 Mrs Claus
 Christmas elf
 fairy, angel or witch
~~~~~~~~~~~~~~~~~~~~~~~~~~~~~~~~~~~~~~~~~~~~~~~~~~~~~~~~~~~~~~~~~~~~~~~~~~~~
 rearing horse or unicorn
 Winnie the Pooh
 lamb
lamb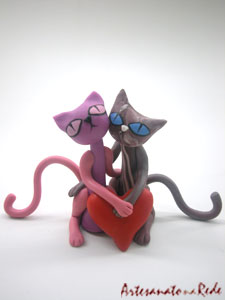 kitties
Cold Porcelain cont'd
a doll's heada different doll's headMrs ClausChristmas elffairy, angel or witch~~~~~~~~~~~~~~~~~~~~~~~~~~~~~~~~~~~~~~~~~~~~~~~~~~~~~~~~~~~~~~~~~~~~~~~~~~~~
rearing horse or unicorn Winnie the Poohlambkitties
Monday, November 14, 2011


Friday, November 11, 2011
Cold Porcelain DIY Recipes
COLD PORCELAIN RECIPES
electric non stick pan
blender
1 cup cornstarch
3/4 cup Elmer's glue (white)
1/2 cup water
1 teaspoon ponds cold cream (must use this brand for this recipe to work)
1 teaspoon baby oil
once you start this don't stop especially when heating don't stop stirring
Put cornstarch in a measuring cup
In a mix bowl combine glue, water, baby oil and ponds
Mix together well
Slowly add cornstarch mix till smooth
Place in a non stick surface pan or electric skillet on low or med
Keep stirring the mixture until it balls up like bread dough
Remove form heat and as soon as you can touch it, knead it (you can use a small bit of ponds on your hands so it wont stick)
It may be amber colored at this time as you knead it if you are doing it right
it will start to turn a bright white with no lumps and be extremely smooth
You must store in wrapped saran wrap and ziplock bag so you have no air exposure as it air dries
do not refrigerate
It has a transparent look to it when air dried. You can add color to it with oil
colors.
~~~~~~~~~~~~~~~~~~~~~~~~~~~~~~~~~~~~~~~~~~~~~~
Second recipe:
1 cup cornstarch
1/2 cup water
1 T glycerin
1 Cup white glue
1 T cold cream
~~~~~~~~~~~~~~~~~~~~~~~~~~~~~~~~~~~~~~~~~
Third recipe:
1 cup cornflour (4oz) + 1/4 cup for kneading cornstarch
1 cup white tacky glue (8oz) (Aleene's is the best to use)
3 tablespoons baby oil.
Mix together all ingredients in a non stick pan and heat gently over a low heat, stirring with a wooden spoon. The dough will come away from the sides of the pan and stick in a big lump to your spoon. Cook for another minute or so and then put it onto a plate and knead in the rest of the cornflour (1/4 cup). You get in a real mess with it all over your hands.
You must let it cool completely before wrapping it up in a couple of layers of cling film (saran wrap) Store it in another plastic bag or a plastic box.
If you wrap it whilst it's still warm it will go mouldy.
If it's still too sticky, you can zap it in 10 second bursts in the microwave.
Some people make theirs in the microwave to start with: use a bowl or pan and a spoon that you won't use for food. I've not tried making it in the microwave from scratch but I do zap it sometimes if I've not cooked it enough in the pan. You don't want it to go crumbly in the pan; if you do then it's overcooked and has to be thrown out. So undercook it in the pan and finish it off in the
microwave to be safe.
If you want colored cold porcelain:
For darker colors, use oil paint. Acrylic paints will crack when used in large amounts; acrylic paint is more for pastels or soft colors.
Friday, October 28, 2011
Something just a bit different from my normal posts here + a Give-away!
Some time ago I had a customer ask me to make a roombox for her 1:12 Dracula rising from his castle. She also wanted a graveyard to show off some additional ghosties & skeletons. I immediately thought about how perfect a ruined castle would be....
Although there's not much more to do, other than make the interior of the ruins look just that little bit more dark and dank & give the graveyard grounds a spookier look, I doubt I'll have it ready this month but....
.... since Halloween is almost upon us, I thought I'd show you some more Work-In-Progress photos:


I didn't want Dracula feeling lonely so I added 3 little friends flying close to the stone walls....

So now for my give-away news..... unfortunately this is for facebook followers only:
I intend having a give-away of a 7"x9" (2 sided)roombox when I reach 100 likes on my OrrLakeMiniatures facebook page (winner to pay shipping).
Every person following gets one entry so you'd have a 1in100 chance of winning.
Here are some examples of 2-sided roomboxes that I've made:


Friday, October 14, 2011
Tuesday, October 4, 2011

Saturday, October 1, 2011

Monday, June 20, 2011
Millinery Plus
 The ease of straw hat making
 Straw boater
 cowboy hat, sort of!
 clay based hat
 1940s outfit including matching hat
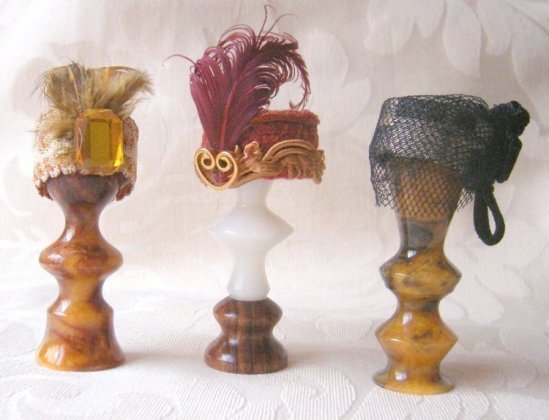
 velvet hat
 floral hat + the jewelry
 Not only the turban hat but also the outfit.
Flower Brooch

This "brooch" was originally made from gum paste to sit atop a cake made in the shape of a purse but can be made out of air-dry or even polymer clay.
Sunday, June 19, 2011

Breyer Horse

Breyer horse made out of "amazing sculpt" a two part epoxy clay similar to Magic Sculpt or Apoxie Sculpt. This is a ten step tutorial. Nicely detailed.


Sunday, January 23, 2011
Tips & Techniques for Sculpting
Antonette Cely Dolls: wefting doll hair & making eyes using polymer clay
Jean Nordquist Dolls: porcelain doll painting tips
OOAK Guild
Andrew Loomis Anatomy Book: Drawing the Head and Hands
baby reference pictures
facial expressions
eye size chart
Marika's doll tutorial Click on Tutorials (It is not under construction; just scroll down)
Katherine Dewey's Tips & Techniques including proportioning the human body
How to build a light box
How to make a BJD


Subscribe to:
Posts (Atom)