Faux Stone Floor using Drywall Compound:

Here's a picture that gives a better view of the floor of Tall Chimneys kitchen. I spread the drywall compound and let it dry a few minutes so it wasn't gloppy. I used a pencil to lightly trace out the shapes of the stones. If you press down on the pencil too much you make ridges, not enough and your stones tend to become indistinct. It takes a few practice trys. I made a couple of errors and just resmeared it up and started over. When your stones are drawn let the floor dry thoroughly overnight or at least a few hours. I next sanded the floor where I had any unwanted bumps and ridges. After that I started smoothing it with a damp rag. A damp rag is the same as sandpaper to unpainted drywall compound. I didn't want the stones perfectly smooth, but I didn't want them lumpy, either. I just kept working with the rag til I got the look I wanted. The nice thing is, if you feel you have totally botched the whole thing, or even just one section of it, you can reapply compound and start over or fix a section. I know, I goofed a couple of times and had to do a fix.
When you're happy with your stones you can paint them. I like to use color washes when I paint stones. I'll cover the stones in a base color, then start applying washes. You can wait for the base to dry or you can apply the washes right over it while its damp. The look can differ a bit one way or the other, you have to try and see what you prefer. To make the washes I select the other colors I want to show up in my stones. I don't recall the exact blend. Most likely it was a mix of ochre, off white, a beigey color, a brown...Color washes are easy to use. They're wet and just flow right onto the surface when you touch your brush to it. If you don't care for the color you can go over it with another wash and change it, or you can intensify it. I did a bit of color washing over my base color in a general way for the first step, giving the whole floor a sort of subtlely mottled appearance. I then began to pay attention to the individual stones. I'd do a stone here and there in a browner wash, then others with an off white wash til I was satisfied. The whole secret to successful painting techniques is to relax, let your wrists loosen up and just fool around with it til it begins to get comfortable and it seems to just naturally flow. I've made many stupid painting mistakes when I was tense and worried how it was going to turn out. It's funny, after years of painting I'm still pleased and surprised when things turn out just right.
A non-working miniature Venetian blind
.JPG)
This project is pretty easy to do. The materials are cheap, so if you make a mistake, just start over. The result looks pretty impressive.
Materials:
Cardstock
Ribbon
Dollhouse molding or strip wood for the valance
Hot glue or other glue for attaching ribbon to paper
White, wood glue, (or optional contact cement)
Thin scrap wood
The slats of the blind are cut from cardstock. I happened to have a paper cutter, which made cutting the paper strips a quick job.
Cut a sheet of cardstock to the width of your window frame. You’ll then cut the strips from this sheet.
Ideally, the paper strips should be 3/16” wide, which equals a 2” wide real life blind slat, but ¼” wide strips work just as well.
You’ll need enough strips so that when laid side by side, they’ll cover the window. I saw right away that not all the strips I cut were exactly alike. Some were a bit too narrow, others a bit too wide, so I cut more than I needed.
Once I had a nice little array of paper strips I started matching up the ones that were closest in size, and I arranged them so that they’d cover about half my window. I then set these safely to one side, keeping the other strips to stack at the bottom of the blind.
If you want your blind to cover the full length of your window, you’ll just have to make sure you have enough paper strips that are the same width.
I then cut 2 lengths of ribbon, making them quite a bit longer than I needed, in case I made a mistake somewhere.
I drew a picture of the window on a piece of paper, then I drew on how I wanted the blinds to look, measuring the distance between the tapes (ribbon).
and checking how many slats I was going to need. A standard single dollhouse window needs about 13 slats to cover it halfway and about 26 for full length.
Iron the ribbon before you use it, so that it stays nice and flat. I used a bit of spray starch to stiffen it up a little, and make it easier to work with.
I decided to use hot glue, because I didn’t feel like waiting for glue to dry, and I wanted to make sure my paper slats or ribbon didn’t crumple from the glue. You can use any other glue that you feel works well for you.
Lay a length of ribbon on the table, then squeeze a thin bead of hot glue on the ribbon, about 1” or so long. You don't want the glue to harden before you get your paper strips attached. Carefully lay your paper strips on the glue, pressing down gently. You’ll want to leave about a ½” overhang.
You’ll also want to leave an extra 1” or so of ribbon at the top.
Once you’ve got one side done, carefully flip the paper strips and ribbon over.
To attach the second ribbon, you’ll need to glue the ribbon down onto the strips, instead of gluing the strips to the ribbon. From my experience, I found this the easier way.
Mark your ribbon, so you know where to bead on the glue. You don’t want it to go up or down too far, or it will get in the way during the next steps.

You should now have what, on the face of it, looks like an unfinished tiny Venetian blind.
If you’ve decided to make a blind that completely covers the window, you can skip the next section I call “stacking”.
Remember the extra paper strips, that may have included ones that were maybe a tiny bit too narrow or wide? You can use these at the bottom of the blind.
If you look at a real size Venetian or mini-blind, you’ll see there’s a wooden or polyvinyl slat at the bottom. I used a Skinny Stick to make one for the miniature blind. You can also cut one from a 1/16” thick piece of basswood, or a craft stick. Cut it the same size as your paper strips, and paint it white, and let dry.
Next, glue a paper strip to the wooden slat. Use just a narrow bead of white glue down the center. Keep gluing on strips of paper till the height of the stack looks right. How many should you glue on a stack? That’s up to you.

If you’re making your blinds full length, you’ll just need the wooden slat.
Position your slat, with the stacked paper strips, on its side, just under your unfinished Venetian blind. You’re going to hot glue the ribbon to the front of the stack, then down under the bottom and up the back.
When it’s all cooled, dry, and secure, you’ll need to glue the ribbon up the back of the paper strips.
At this point, you’ll have a cute, very mini Venetian blind. All you have to do now is attach it to the window frame.
Next I cut a length of dollhouse molding, though I could also have used stripwood, for my valance.
I lined the top of the blind with the bottom of the valance. I chose to overlap my blind slightly (about 1/32" or less), gluing it to the very bottom edge of the back of the valance. I thought it might make the blind a little bit sturdier. Then I glued the end front and back ends of the ribbons to the back of the valance, cutting off any extra ribbon.
I used a short piece of bass stripwood as a spacer, and also to help in firmly attaching the blind to the window frame.
The spacer makes the top of the blind come forward slightly, so that the bulge at the bottom isn't noticible unless you peer closely at a side view.

I glued the spacer to the back of the valance, sandwiching that tiny edge of the top paper strip between the 2 pieces of wood.
When the whole assembly was dry I glued it to the window frame. Since I was using wood glue, which can sometimes take a while to set, I turned the house on its side, so that the wall be more or less horizontal.

It occured to me now, that contact cement is another solution. You'd need to spread a little of the glue to the back of the spacer, and some to the section of the window frame where you were going to attach the blind. Wait 10 to 15 minutes til the glue was dry, then set the blind into place. You have to be careful and do it right the first time, because you will probably not be able to reposition it.
The last step is to cut tiny pieces of valance molding to glue into the space between the valance front and the wall. See side view photo.
You can skip the side pieces if no one is going to see them. I believe I attached one to only to one side, because no one will ever see the back side view.
When gluing the paper strips, I placed them side by side, and when the light shines through the window, you can see little glimmers of light. If you want to block the light, overlap your paper strips slightly when gluing them to the ribbon.
A doormat

Do you have a problem with tiny feet tracking dirt and mud onto your clean dollhouse floors? I'm not talking about the cat.....that's a small attempt at humor. OK, a very small attempt.
The last time I bought non slip matting to put under my real size runners and area rugs, I was immediately reminded of a rubber welcome mat.

I set some scraps aside, thinking, too bad this stuff doesn't come in black. I could cut it up and sell it as dollhouse doormats for 99 cents each.
It doesn't seem to come in black, though. So to turn it into a doormat, I had to cut a piece and paint it.
I used black acrylic craft paint to do it, painting one side and letting it dry, then flipping it over to paint the other side. When that was dry I painted any little white bits that were left. One word, though, if you bend the mat, the black paint might crack or flake off.
This does make a great looking rubber doormat at a cost of 0 money, as long as you happen to have some of the matting around the house. I've also recently seen small squares of the same non slip product being sold in bundles, to put under the corners of rugs, for as little as 99 cents, and also as a roll of shelf matting for kitchen cabinets. The shelf matting came in white or brown. It was also very inexpensive.
Too bad it didn't come in black. You'll just have to paint your own doormat.
PS
Since publishing this, I've heard from several people that they've seen the matting sold in black. Too bad I haven't seen black ones in my area.
A Simple Bench
When I realized I needed to make some of my own miniature furniture for my dollhouses, because I couldn’t find what I was looking for in mini shops, one of the first things I made was a bench.
This is the bench, something rustic and old world for the cottage I had just built.

Let’s start however, with a basic style.

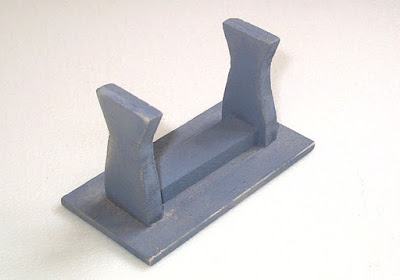
This is as simple as it gets, a seat, 2 supports and underneath a structural piece.
This particular bench was made of balsa. I use a band saw to cut my wood. I had a scroll saw, back before I got into miniatures, but it broke, and I’ve never gotten around to buying another one.
Generally, you can sand balsa pretty well, except for the grain, which shows up no matter how much you sand. If you have a Dremel, or similar tool, it makes sanding curved cuts so much easier. These benches are pre Dremel, but it’s ok, they’re rustic and a somewhat rough look is quite appropriate. On the other hand, don’t leave your rustic furnishings too rough. You need to decide just how much you want to sand to give things the look you want.
When designing a bench like this, just decide on how wide, long and high you want it to be. This particular bench is 1 & ¾” high. The seats of chairs and benches should be around 1 & ½” to 1 & ¾” high, with 1 & ½” being the most common used height.
Once you’ve decided how long and wide you want it to be, cut out a simple rectangle for the seat. With the supports, you can stay simple or get a little creative. I tend to lean towards curves, some people like straight sides. Look around at benches for sale in stores, or pictures in magazines and catalogs for looks you like and adapt them.
My favorite tool to draw curves for furniture is a anything I have in my kitchen. I have a compass up in my studio, but I find I do most of my planning while I’m in my kitchen. When I kept the compass in my kitchen drawer, I always found I wound up needing it up in my studio. I suppose the smart thing would be to buy another compass for the kitchen drawer, but I keep forgetting to. Anyway, as long as my kitchen is full of glasses, lids and coins, I can make a curve whatever size I want.
I’ll start designing the supports by drawing a rectangle that’s as high and about as wide as I want the support to be. As an example, here I drew a rectangle 1” wide and 1 & 3/8” high. Assuming that I’m using 1/8” thick wood for the seat, that would make the finished bench 1 & ½” high.
In the upper illustration I drew a curve with a red pencil using an item I had on my desk. In black pencil, I drew another pair of curves using a larger cup. The smaller stamp holder is 1 & ¾” in diameter, the cup is 2 & ¾”. You can see how the curves differ.
Note also, in the lower illustration, that I marked off the bottom and top of the curves. I’d cut those little tips off when I cut the bench support. Those tips tend to break off eventually.
The final piece you need to cut is a brace that helps hold the bench pieces together, and here it is.
Below is another bench, made just like the blue one, only it’s longer. Notice that there are 2 braces, one at the top, one lower down. You need extra bracing to make a longer bench a sturdy piece of mini furniture that won’t break into pieces the first time you drop it.

By the way, use wood glue to put it all together. Wood glue is formulated to hold wood, and is a basic woodworking tool.
Also, sand your pieces before you glue them together, it makes things easier.
Finally, lets talk about the paint.
I painted the bench, then sanded it smooth. Paint will raise the fibers of the wood and make the piece seem very rough. The sanding takes off quite a bit of paint. Use an emery board to sand your curves and edges. If you have a small rotary sander like a Dremel, that’s great, however, use the Dremel to sand before you paint, not after, it will take every bit of paint off.
After sanding, I painted the bench again. This time I sanded gently, to give it a worn look. I used very fine sandpaper and the finer side of the emery board. Another great sanding tool is a foam sander. They come in various grits, in blocks or in sheets. I’ll cut smaller squares off sheets of foam backed sandpaper to sand my miniature pieces.
I’ve seen lots of pieces of miniature and real sized furniture that were sanded to give a worn effect. The problem is that many over sand and/or do it in the wrong places. Places that get handled or kicked will show wear and tear. Places that are constantly rubbed will eventually loose some paint color. Edges get worn before anything else.
Don’t wear your paint down willy-nilly, give it a bit of thought and you’ll be glad you did.
How to make a miniature planter

I had originally published this tutorial on my old blog back in 2007.
Materials...
4 balusters: I used the traditional balusters, made by Houseworks
1/16th " thick basswood: a small piece
A very thin dowel: I happened to have some wooden old skewers laying around. My skewers are @ 1/8" in diameter.
A square dowel @ ¼” thick
A piece of wood 1/8 to ¼” thick. I used a piece from a bag of assorted craft wood I got at a craft store or Walmart
A piece of decorative wooden trim
Wood glue
Wood putty, in case you drill your holes all the way through the baluster
A drill, I used my Dremel tool.

I began by drilling 2 holes in each of my balusters, you’ll notice one is slightly lower than the center of the block, the other hole is closer to the top of the block. This is important, or your holes will just run into each other.
Be sure your holes are centered and spaced correctly. If your holes are wrong, your dowels will look all crooked.
Try not to go all the way through the baluster when you drill your holes. If you find you’ve gone all the way through, don’t despair, just make sure you have some wood putty to fill the holes up before you paint the finished planter.
Next cut the dowels. You’ll need 2 long and 2 short. I cut the longer ones 3” long, and the shorter ones 1 1/8 “ long.
You need to give the ends of your dowels sharpened points, so that they can fit into the holes you drilled in the balusters.

At this point, some might say, well why can’t I just make the holes in the bottom of the baluster bigger, so I cen just put the whole dowel straight in? The answer to that is, if you make the tiniest mistake in the placement of your drill bit, 2 bigger holes in the bottom of those balusters will eat up the whole piece of wood. Why not use a thinner dowel? If the dowel is too thin, it’ll break more easily, and the proportions of the plant stand won’t be as pleasing.
I used an electric pencil sharpener to sharpen the ends of the 3” long dowels. I had to lift them in and out and turn them a bit, but they came out fine. You can’t stick a 1” long dowel in a pencil sharpener, so I sharpened one end of the dowel before I cut it. I found that a drum sanding attachment on my dremel worked very well to shape the other end of my 1 1/8” long piece.
Dry fit the rods in place in the holes

This shows how the rods go into the baluster block.
Now you are ready to glue the longer rods in place. Be sure you match your holes up correctly. Dab the rod points with a glue and push them into their holes. Press them in firmly, but not too hard. Lay the 2 balusters which are now attached to each other by the rod. Make sure that everything is laying down flat, with no twisting. Readjust the rod before the glue has a chance to set. Make sure everything looks straight.
Repeat this with the other 2 balusters and long rod.
Let the glue dry and set a bit.
Meanwhile, get the piece of 1/16th inch basswood.
I cut 2 pieces, each ¾” x 3 ¼”. When the glue on my balusters was set enough so I could handle them, I glued the basswood pieces to the upper parts of the balusters.

I used some small clamps to keep the basswood in place and let dry. My basswood strips turned out to be almost 1/16th” too long, which was fine. The extra bit can be sanded or cut off so that the ends of the basswood pieces are even with the baluster. Having them a bit too long is better than a bit too short. If they are too short, you have to recut new baswood strips.
Again, when gluing, be sure you keep everything straight. A jig is helpful. I still haven’t gotten around to making or buying one, so I used a carpenter’s square and a square dowel to align my pieces.

Be sure the glue on these pieces is quite dry and firm before you proceed to the next step. Look at the picture below to get a closer look at how the pieces fit together to form the box.

I cut the square dowel into 2 pieces that would fit between the balusters. They were 2 and 13/16th inches long. I glued them to the bottom of the inner side of the basswood. Clamp and let dry. Below you can see the underside of the plant stand

I then cut 2 small pieces of basswood, each ¾” x 1 and 5/16th inches. These will make up the sides of the “box”. I also cut a piece from the thicker wood, the one listed as 1/8 to ¼ inches thick. I could have used some thin basswood, but I felt the thicker wood might make the planter a bit sturdier. This thicker piece was 1 and 3/16th inches by 3 and 1/8”, and was notched in the 4 corners . This piece forms the bottom of the “box”.

Now comes the tricky part, adding the side pieces and gluing it all together.
Take one of the short dowel pieces and glue it into place at the bottom of the baluster, then carefully glue the small basswood piece into place. I held it in place for a few seconds, then gently layed it down on its side .
I slipped a piece of the thin basswood under the lower end of the legs to keep everything aligned,while the piece was laying on its side, and let it dry. I then flipped the planter over and glued the other short dowel and the other basswood piece into place and let dry.
When everything is dry and set, you can pop the thicker bottom piece into place. If it’s a bit big, just trim where needed. If it’s a bit too small it doesn’t matter, it will still hold everything together once it’s glued in place. Just apply a bit of glue everyplace where this piece touches another piece.. Let dry.
If you’ve drilled through the baluster bases, apply some wood putty.
Next you can apply some decorative trim. I had a couple of pieces to choose from, I selected the one I thought looked best.
It’s important to lay out the trim pieces carefully so they are in perfect visual balance. No cutting through a flat part on one end and a curved part on the other end.
Then cut to fit, glue and let dry. Small clamps are helpful.
Sand any rough edges with an emery board.
You are now ready to paint. I chose to use spray paint for this project. I have found, however, that if you apply a bit of acrylic artists paint to the cut edges of the wood, it’ll seal them and the spray paint will come out looking better, faster.
I dabbed a bit of white paint in a few spots and when it was dry I spray painted. I used the fast drying paint, and was able to apply a new coat every 15 minutes or so.
I did sand the flat trim surfaces slightly after the second coat had tried. I continued applying coats of paint til I was satisfied that everything was covered with an even coat of paint.
ADDING THE FLOWERS
You can place potted plants inside the stand. I have those wooden “pots” that I paint to look clay-like, however, they are a bit big. Mine are 1” tall which translated into human sized is a pretty big pot, or 1 foot high.
I decided to just “plant” the flowers into the stand.
I used a piece of the ¼” thick scrap wood I used to form the bottom of the “box”. I cut it the same size, with the notches, and painted it dark brown.
I rummaged through my flower and leaf pieces and made my selections. I had purchased a clump of tiny leaved ivy in the floral department of a craft store to use when I did the exterior of the Nuthouse. I plucked off some of the smallest leaves, then trimmed them somewhat and used them to form the leaves of the yellow plant. Houseplants are actually tropical native plants, and quite a few, if you’ve noticed have rather large leaves, so the size of these works well for that.
I also found that if you drill holes into the wood for your flower and leaf stems, they will be more likely to stand up just the way you want them to.
When your selection is made, and the proper sized holes are drilled, dab a tiny bit of hot glue in 2 or 3 holes. The glue will melt the plastic stems if you apply it to the flower, but I’ve found that in the moments it takes to put down the glue gun and pick up the flower and place it into the hole, the glue has cooled enough so it is not a problem.

The circled areas show where the stem of the plant is less likely to melt. I had to cut the stem of the longer flower on the left. When gluing it into place, I let the glue cool a couple of seconds longer. You can also tape several fragile flower stems together with floral tape, then drill a hole big enough to hold the taped stems.
Once your plants are glued in the way you want them, you can add tiny pieces of reindeer moss underneath them, to partially obscure the painted wood and the occasional bare stems. I had originally considered using coffee grounds, but saw that the slight fluffiness and texture of the moss would suit better.
Finally I glued the piece of wood holding my completed flower arrangement in place inside the planter using wood glue.


