COLD PORCELAIN RECIPES
electric non stick pan
blender
1 cup cornstarch
3/4 cup Elmer's glue (white)
1/2 cup water
1 teaspoon ponds cold cream (must use this brand for this recipe to work)
1 teaspoon baby oil
once you start this don't stop especially when heating don't stop stirring
Put cornstarch in a measuring cup
In a mix bowl combine glue, water, baby oil and ponds
Mix together well
Slowly add cornstarch mix till smooth
Place in a non stick surface pan or electric skillet on low or med
Keep stirring the mixture until it balls up like bread dough
Remove form heat and as soon as you can touch it, knead it (you can use a small bit of ponds on your hands so it wont stick)
It may be amber colored at this time as you knead it if you are doing it right
it will start to turn a bright white with no lumps and be extremely smooth
You must store in wrapped saran wrap and ziplock bag so you have no air exposure as it air dries
do not refrigerate It has a transparent look to it when air dried. You can add color to it with oil
colors.
~~~~~~~~~~~~~~~~~~~~~~~~~~~~~~~~~~~~~~~~~~~~~~
Second recipe:
1 cup cornstarch
1/2 cup water
1 T glycerin
1 Cup white glue
1 T cold cream
~~~~~~~~~~~~~~~~~~~~~~~~~~~~~~~~~~~~~~~~~
Third recipe:
1 cup cornflour (4oz) + 1/4 cup for kneading cornstarch
1 cup white tacky glue (8oz) (Aleene's is the best to use)
3 tablespoons baby oil.
Mix together all ingredients in a non stick pan and heat gently over a low heat, stirring with a wooden spoon. The dough will come away from the sides of the pan and stick in a big lump to your spoon. Cook for another minute or so and then put it onto a plate and knead in the rest of the cornflour (1/4 cup). You get in a real mess with it all over your hands.
You must let it cool completely before wrapping it up in a couple of layers of cling film (saran wrap) Store it in another plastic bag or a plastic box.
If you wrap it whilst it's still warm it will go mouldy.
If it's still too sticky, you can zap it in 10 second bursts in the microwave.
Some people make theirs in the microwave to start with: use a bowl or pan and a spoon that you won't use for food. I've not tried making it in the microwave from scratch but I do zap it sometimes if I've not cooked it enough in the pan. You don't want it to go crumbly in the pan; if you do then it's overcooked and has to be thrown out. So undercook it in the pan and finish it off in the
microwave to be safe.
If you want colored cold porcelain:
For darker colors, use oil paint. Acrylic paints will crack when used in large amounts; acrylic paint is more for pastels or soft colors.
 casting 3D objects
 adding color to resin
 what is a BJD and other tutorials.
 sculpting the fingers
 the palm and stringing the fingers
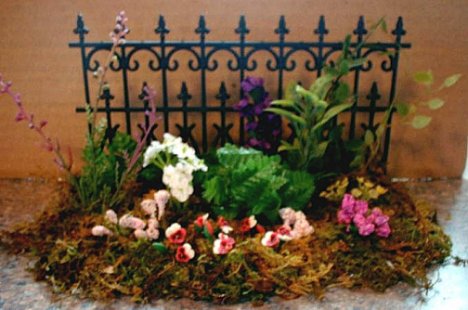 a flower border
 apple blossoms
 morning glory vine
 poppies
 pulled flower


 air dry clay carnations

 a doll's head
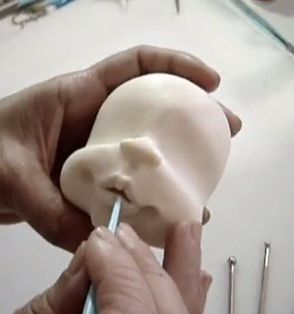 a different doll's head
 Mrs Claus
 Christmas elf
 fairy, angel or witch
 rearing horse or unicorn
 Winnie the Pooh
 lamb
lamb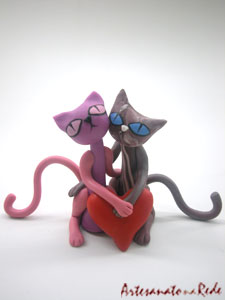 kitties


 The ease of straw hat making
 Straw boater
 cowboy hat, sort of!
 clay based hat
 1940s outfit including matching hat
 velvet hat
 floral hat + the jewelry
 Not only the turban hat but also the outfit.