Saturday, September 26, 2009

Louis XVI Bergère Chair

by Christine-Lea Frisoni from her book "Le Grand Livre de la Maison Miniature"


(this has been translated from her french site)


Supplies for the shepherdess Louis XVI

- Bristol-board (1mm thickness)

- fine Bristol-board

- double sided foam tape (0.5 cm thick)

- double sided foam tape (1 cm thick)
I have tried to come up with the most likely translation of "carton plume" as double sided foam tape. If someone has a better translation, pls let me know!

- 2 wooden staircase dowels

- 2 round wood dowels

- cotton canvas cut to A4

- embroidery yarn

- woodworking glue

- white paint (acrylic Matt) or Gesso

- model paint Gold (Humbrol)

- scissors


Trace and cut out the forms on a 1mm thickness bristol-board. Make 3 copies of each


- glue each form together until it reaches a thickness of 3mm. The Bristol-board makes it easy to cut using scissors


- For the legs, I used staircase dowels, recut to a height of about 3.1 cm


shape the bottom of the leg, thus
make a small ring cut from Bristol-board using 2 pieces of 1mm x 1mm to give an approximate height of 1cm. This is placed 0.2 cm from the end of the foot.


Order of assembly


note the curves...

the arms are made of 2 pieces, assemble, glue onto the chair & if need be, adjust with small pieces of wood

allow the glue to dry thoroughly

- paint the first coat using Gesso. This will act as protection of joinings before using gold modeling paint (Humbrol) containing solvent. The solvent will otherwise dissolve the glue holding the bristol board together.
- When the Gesso is quite dry, dry brush with gold paint, allowing the white to show through It is possible to consider a hand embroidered tapestry (in this case to envisage a fabric of the silk gauze and fine embroidery cotton) however, to remain in the practical and fast spirit, for this project, the tapestries will be printed on a fine cotton fabric unbleached or white.

To print fabric, it is enough to cut a piece of fabric to an A4 size, and to pass it like a sheet of paper in the printer. If the fabric is too flexible, attach it on a sheet of paper with adhesive taped along the edges. In this case to cut the fabric a little so that it is smaller than the sheet of paper.

When printing choose printer settings: the highest resolution + special papers My first photocopied fabric was done in 1999 and the color has not faded.

- cut the following shapes of double sided foam tape


remove the film from the top of the seat shape and press the printed fabric down. Bring your fabric around underneath. Remove the bottom film and stick the seat in place on the chair.

Arms:
the finished measurement for the arm cushions should be an oval 0,5cm X 1,5cm in size

Cover the back of the chair in a similar manner using the printer fabric in front and plain fabric in the back.


- Cut 1 m of embroidery yarn. fold in half, twist it, and fold up it into two, it will be twisted on itself to give a fine braid. To keep it from unravelling, spread a thin layer of paste over the entire length and glue along all edges of your fabric at the front:


Your shepherdess Louis XVI is finished

Skeleton in Your Closet

Skeleton in the Closet
By Deb Roberts
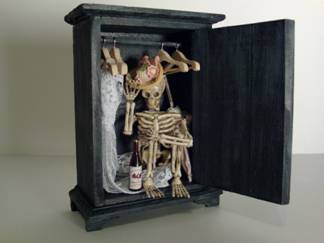
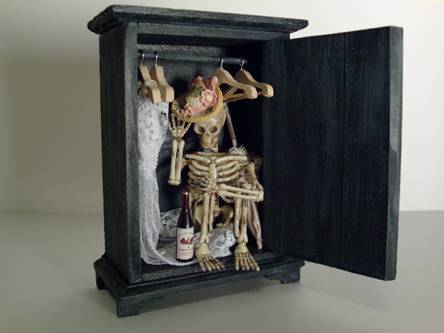
Every family has a few skeletons in the closet, and this time of year, it’s always fun to show them off! In my family closet, we have Old Aunt Harriet. If the truth be told, Aunt Harriet had a taste for wine, but no one liked to talk about it. Of course, Aunt Harriet never admitted to it either, but at least one family photo caught her in the act. As long as we’re exposing a family secret, we’ll also share how to make this cute Halloween mini.

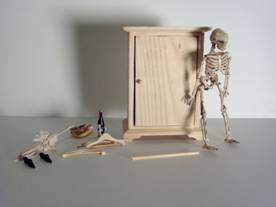
Supplies:
One small wooden hutch from a craft store
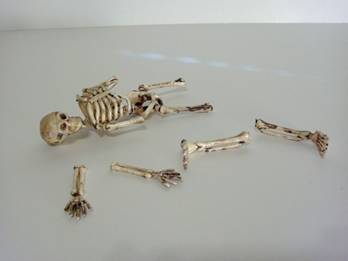
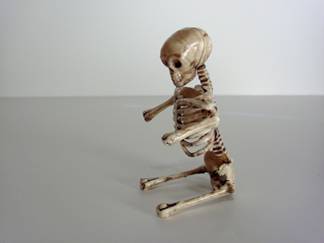
One plastic skeleton
Small dowel cut to fit inside of closet for hanging rod
Small wooden hangers
Bit of lace for dress
Accessories such as a parasol, hat, shoes and bottle of wine
Black and grey paint
Glue gun
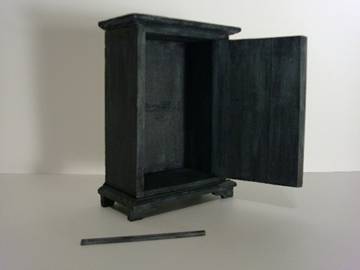
Begin with painting your wooden hutch. Since I was going for a Halloween look, I used black followed by a dry brush of grey to age the closet. You can use your own choice of paint colors to fit your mini décor. Paint the dowel to match.
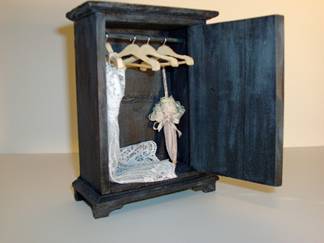
Place the hangers on the dowel rod and glue it in place. Be sure the dress is already on the hanger since it’s hard to reach into the space once the hanger is on the rod. (Quick tip: if you don’t have a mini dress handy, use a piece of lace tied with a bit of ribbon to give the form of a dress) Tuck the parasol in the corner.
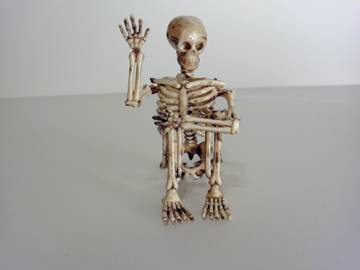
Now it’s time to begin reshaping your skeleton so it will sit nicely in the closet. Using a sharp pair of scissors or your EZ Cutter, cut off the arms just above the elbows and the legs just above the knees.
Bend the upper arms at the shoulder joint so they are pointing outward.
Using the hot glue gun, glue the lower legs onto the cut edge of the upper legs, giving the legs a natural looking bend.
Place a dot of hot glue on the outer edge of the left knee and press the left arm against it to hold it in place.
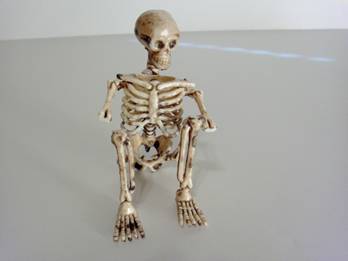
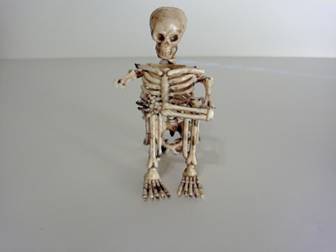
Glue the forearm onto the elbow joint, so that it appears that the skeleton has its arm wrapped around its knees. Place another dot of glue on the right knee and hold the hand in place, slightly bending the fingers.
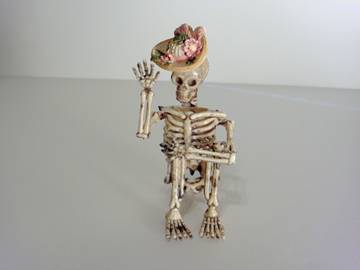
Glue the right lower arm to the elbow joint, hand raised as if waving.
Then add the hat. Aunt Harriet always wore hers tilted at a rakish angle. (She was such a character!)
Now your skeleton is ready to be placed in the closet, seated on the floor. Add the wine bottle next to it, and you’re all set!

Did You Make Your Bed Today?

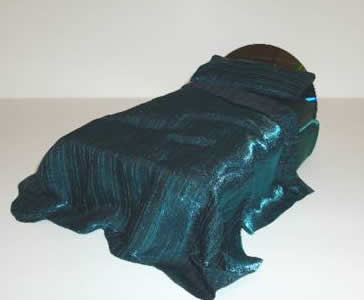
This Sleek and Shiny Bed tutorial comes to you thanks to Deb Roberts.

A modern house needs a modern bed and something sleek and shiny might just be what you’re looking for. It’s easy to make a modern bed with just a few simple supplies and a little creativity.

Supplies needed:
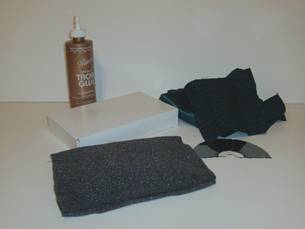
One cd cut in half
One small box (an HOM box bottom works perfect)
Two fabrics of your choice
Piece of soft foam or folded quilt batting
Tacky glue or a hot glue gun
Liquid starch
Sewing pins


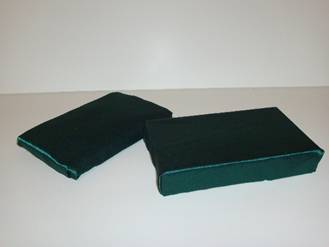
Cut the foam or batting to fit the top of the box and then cut the fabric you wish to use for the mattress. The easiest way to do that is to lay the foam on the piece of fabric and then cut the fabric about two inches away from each edge. Fold the edges of the fabric over the foam (hospital corners work well) and glue into place. You can use tacky glue and pin it down until the glue dries or just use a hot glue gun. All the gluing is done where it can’t be seen so you don’t have to worry about it being pretty. Repeat the same steps to cover the box.
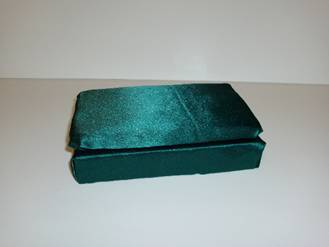
Now you can simply glue the mattress in place on top of the box.

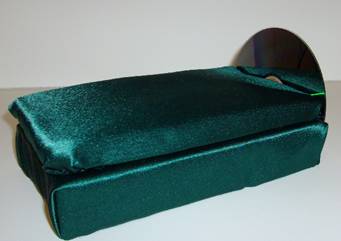
A cd half makes a great headboard and is fairly easy to cut with an EZ cutter or by scoring it with an exacto blade till it can be broken on the scored line. (be sure and wear eye protection when you do in case small shards fly off) Then glue the cd in place as the headboard.

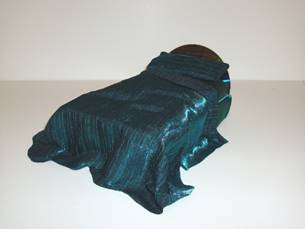
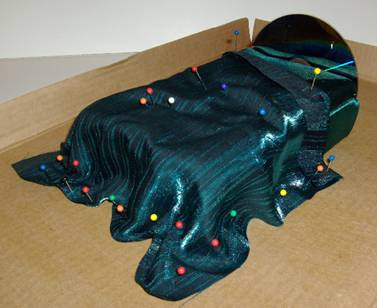
Take your second piece of fabric (I used a coordinating piece with a tiny pinstripe) and cut it large enough to drape over both sides and the end of the bed. Put the bed on a piece of cardboard and then position the second piece of fabric as a bedspread or sheet. I like a rumpled look to a modern bed………let’s face it, most people don’t have time to make their bed every morning and a rumpled bed gives a live-in look. Once you have the exact look of draping, rumpling or fussiness that you desire, use pins to hold it all in place.


Mix liquid starch with water; about a half and half solution. Using a soft brush or sponge, dab the starch onto the fabric. Be careful not to use too heavy a hand with the brush or sponge because that will flatten out your draping. A light dabbing motion will coat the fabric without pushing it flat.

Leave the bed overnight for the starch to dry. After it has dried thoroughly, remove the pins. With a sharp pair of scissors, trim the edges of the fabric. That will remove any frayed edging or threads, as well as give the finishing touch to the fabric shape.

Place small dots of glue on the bed frame where it can’t be seen to hold the bedspread onto the bed.

To create a pillow for the bed, cut a rectangle of fabric to fit the width of the bed. Fold it in half and glue the edges together, leaving the top open. After the glue has dried, turn the pillowcase inside out and stuff it with cotton. Fold the edges under and glue or blind-stitch the ends shut.

There’s your bed! Sleek and shiny and perfect for your modern bedroom!

Tuesday, September 22, 2009

Needlefelting: Pumpkin, Sheep and... Soap

pumpkin

sheep

Not sure why you'd want to but here's a link to felted soap

Sculpting Tutorials

I was recently asked whether YouTube videos could be hard copied & to the best of my knowledge, the answer is no. (However if anyone knows of a way to do it, I'd love to know!)
I did, however promise to find some printable tutorials. So here goes:


tips & tricks for doll makers

baby tutorial

baby tutorial 2
These are for 12 inch dolls. Adjust for your doll size using the "Creating Doll Clothes Without a Pattern" of Sept 20th, 2009


dress pattern


dress pattern


more Lord of the Rings doll clothes

Monday, September 21, 2009

Friday, September 11, 2009

making faux ivory from clay


http://desiredcreations.com/howTo_CAivoryHorn.htm

making clay hands and feet


http://desiredcreations.com/howTo_PJHands.htm


http://desiredcreations.com/howTo_PJFootses.htm

Wednesday, September 9, 2009

Tuesday, September 8, 2009

Dolly Shoes


http://members.tripod.com/~marsha_4/ShoePat

Sunday, September 6, 2009

flocking techniques


http://www.kerripajutee.com/default3.asp

Saturday, September 5, 2009

Make Flocked Rugs Using Ribbons


http://miniatures.about.com/od/dollhouseaccessories/ss/flockedribbonrug.htm

Faux Smocking Nightgown Tutorial


http://home.mindspring.com/~byrachelle/id9.html

Wrong Way Witch


http://sassyminidolls-tutorials.blogspot.com/

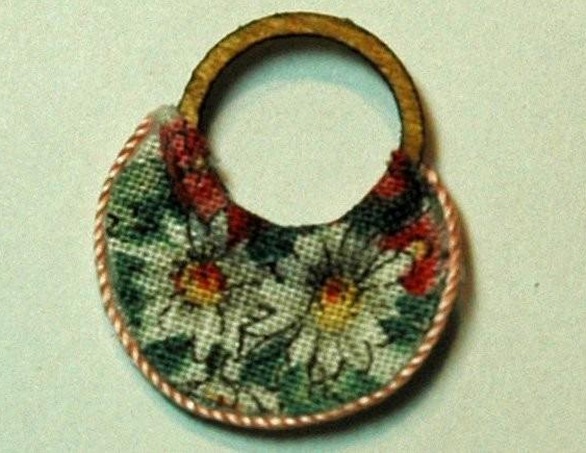
Mini Purse Tutorial


http://minidolls.com/Blog/tiny_purse_tutorial.pdf

Tuesday, September 1, 2009